Sunday, 9 January 2011

Life Drawing


In this session I had to draw just the shadows, not out lines, no tone and no highlights. Just spot the shadows and draw them as they appeared. I think they turned out well, almost similar to wood cuts/lino cuts.


For this drawing I was told to draw out of my comfort zone so do something what I wouldn't normally do. Normally i would concentrate on the face as i like to draw portraits so this time i took a position where i couldn't see his face and tried to concentrate on the proportions of the body and the lines and muscles that show. This drawing accidentally turned out similar to other drawings when i was trying to do the opposite but it shows my style of drawing clearly. Dark and bold.  


For this drawing I was to use white chalk and black paper to just draw the light parts as the appeared, the same kind of thing as the shadow drawing. To show the opposites and make you take notice of all the different tones that are there when life drawing. I didn't find this drawing to be successful in itself but it taught me a valuable lesson and now when i draw or paint i pay alot more attention to shadows and highlights.
This was the last drawing of the session were i was given grey paper and black and white chalk. The grey paper was to act as a mid tone and i had to use the chalks to capture the shadows and highlights, so the same principles for the previous drawings. This proved to be alot more complicated to do than the previous do but a valuable task all the same.

Sunday, 31 October 2010

The Body, Face Scans

I wanted to try another form of 'photography' if you can call it that. I wanted to try different ways of accuratly documenting body modifications. Using a standard computer scanner i scanned in peoples faces who have piercings and the results were really successful. I'd like to continue these using tattoos too.


One of the effective things about these scans is the quality of the images regarding the details in the skin and hair that you can see.

The Body, Photograpy Samples

I wanted to explore body modifications as it's something that interests me and is relevant to me.
I thought photographs would be a good way to do this as it would capture the piercing in an organic way. I didn't plan to edit the images i was just going to be basic and print them out in black and grey. The result was really effective but i didnt use this idea for my final piece however the images were useful to me.


The last two photographs were my favourite because they were successful as photos and didnt have hectic backgrounds or inteferences. The fact that they look similar also makes them look like they belong in a collection of similar photos. I'm going to carry on with this beyond this project as i liked the effect but i didn't continue it for my final piece.

The Body, Monoprints

I wanted to experiment with different textures and layers with monoprint.
I used rubbing over stencils and string and i also tried working into the images with graphite.


Wednesday, 6 October 2010

Screen Printing


Although i used the same stencil for these prints they both had different results which happened by chance. They almost have a different feel to them like each face is showing a different emotion.

Lino Prints

I had a small attempt at a lino print. I have used this media before some years ago so was familiar with how to use it. I chose a small section of one of my continuous line observations using a viewfinder to do my lino print. Because it has to be done in layers and i only had a short amount of time i only did one layer. First i cut out the whites of the eyes because thats what i want to keep white and printed using a beige colour which i wanted to be the colour of the skin. My next step would have been to cut out the areas i would want to keep the beige colour and leave the lines which i would have done a darker colour. I thought just having the whites of the eyes cut out looked very sinister so because i knew i was running out of time i experimented with a darker colour to see the effect.


Tuesday, 28 September 2010

The Egg Drop

Objective: to protect an egg that would be dropped from a height using only an A1 piece of paper, approx 4feet of cellotape and string. We came up with 3 ideas and chose the one we'd think would be more successful which was the paper aeroplane idea.


As you can see by the last picture our egg survived the task.

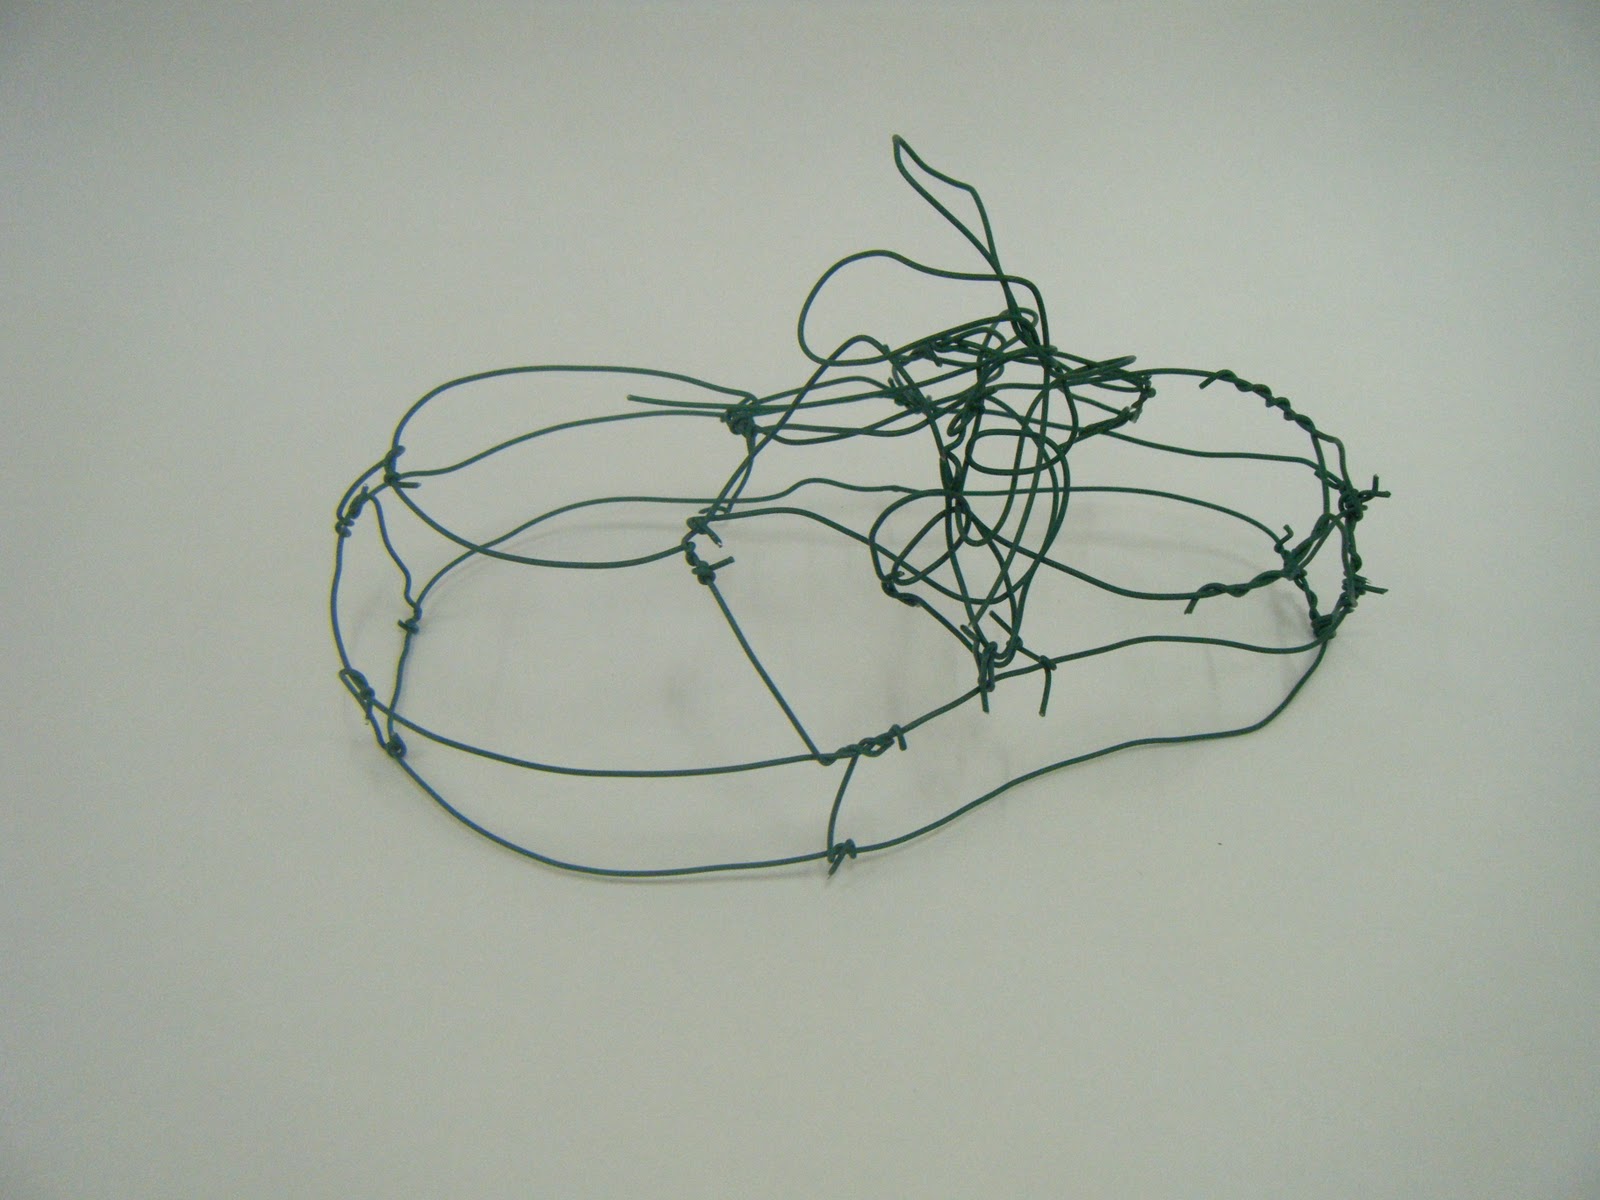
3D


This is my shoe made out of wire. This was my first time working with this media and i did find it difficult tightening the smaller knotts and keeping the overall shape clean so it was recogniseable but in the end i liked how messy it looked and how it looked like a blind conteour or continuous line drawing as it made it look more interesting.

Monday, 27 September 2010

Monoprints and Collographs

For my prints i experimented using black paper as a background and rubbing over textured fabrics to create different effexts. I also made stencils of my tattoo that is on my hand and blotted ink over them to build up on different effects.


I also had access to newspapers and found this interesting picture and mixed some inks and made some prints on it to see what the effect would be.


Monoprints and Collographs

From my hand drawings i chose one that i found to have particulally interesting lines as i thought it would translate well into a collograph. I used a foam like material and traced my hand drawing onto it and cut it out, then stuck it onto thick card. I also worked into the foam with a biro pen to make it more detailed.


This was one of my samples using my collograph. I was happy with the result of the prints as they are really detailed so i then went on to experiment with different colours, backgrounds and stencils to build up patterns and textures.

Monoprints and Collographs


Before i started out monoprints and collographs i completed a series of observational drawings of my own hands using tecniques such as blind conteour and contiuous lines and drawing using my left hand and using materials like ink and sticks, feathers, cotton buds and pencil.

Wednesday, 22 September 2010

Line into stitch. Wallpaper Sample

For this sample I blind conteoured a screwdriver i'd previously drawn onto wallpaper and sewed over it using a round footer used for embroidery on the sew machine. This enabled me to sew round the outline without stopping and it was also easier to create curved lines.


Line into stitch. Applique.

For my next piece I was able to use a sewing machine and other fabrics and other add-ons like buttons and beads. I chose to do the continuous line, blind conteour drawing of my iPod to do this.
This was slightly more successful than my previous sample as i am more comfortable using a sew machine than handstitching. My original iPod is black so i chose to use these colours to give it a negative effect.

Line into stitch. Sample.

Using out line drawings I had to then translate them lines into stitch. My first sample was a handstitch of one of our observation line drawings.
I chose to do the car drawing as i thought it would be an interesting challenge. It wasn't as successful as i had hoped but it was my first attempt at hand stitching a drawing.

Line into stitch.

To start I completed a series of line drawings of random objects using materials such as; compressed/willow charcoal, pencil, graphite and ink.


Some of our line drawings had to be drawn without looking at the page or without taking the pen of the page (Continuous lines and blind conteour)